

Braiding your own hair is simpler said than done. Even the braids that are supposed to be “easy” (whether spotted on celebrities or social media tutorials) seem to require some sort of hair sorcery or superhuman hand strength.
Table of Contents
Braiding Your Own Hair Step by Step
1. The classic three-strand braid
If you’re a beginner, this is definitely the place to start. Consider it braiding 101. Once you nail this technique, you can riff off of it to create more intricate styles. To make this type of braid even easier, start by creating two side braids instead of one single braid along the back of the head. This way you can easily look at the braid in the mirror to get a better feel for the technique.
Step 1
Detangle your hair with a brush and detangler if it’s extra knotted. If you have frizzy hair, you might even consider applying a small amount of hair oil.
Step 2
Divide the hair into three equal sections at the nape of your neck. You’ll have a left section, a right section, and a middle section. Hold the right section in your right hand and the left section in your left hand.
Step 3
Let the braiding begin! You’ll begin by crossing the right strand over the center strand so that it now sits in the middle. Now the formerly right strand becomes the center strand and the center strand moves right. Then, take the left strand and cross it over to the middle so that this strand now becomes the center strand, and the strand in the center moves to the left.
Step 4
Continue on with this pattern, alternating between bringing the right and left section of hair to the center. Repeat until you have about one to two inches of hair left. Exactly how much you want to leave free is up to you. Finally, secure the braid with a hair elastic.
2. The fishtail braid
Delicate and extremely intricate-looking, the fishtail braid looks quite intimidating but it’s actually quite easy. Let’s break it down.
Step 1
Detangle your hair with a brush and/or a detangler. To add a bit more volume to your hair, consider quickly curling the hair before braiding it.
Step 2
Gather hair at the nape of the neck and secure it into a ponytail with a disposable hair elastic. Make sure this is an elastic that you’ll be ok to lose as you’re going to snip it away at the end.
Step 3
Divide the hair in the ponytail into two equal sections. Hold the right section in your right hand and the left section in your left hand.
Step 4
Now you’ll use a technique similar to the three-strand braid except this time we’ll just be working with two. Take a very small piece from the outside of the left section and pass it over to the right section. Next, take a very small piece from the outside of the right side and bring it over to the left side. Repeat this process over and over until you have about an inch or two of hair left. Then, secure it with a hair tie.
Step 5
Now (very carefully!) snip the hair elastic at the top of the braid with scissors and remove it from the hair. Once you get comfortable with this braiding technique you can definitely try to do it without the disposable hair tie step, but it does allow for much more control.
Step 6
If you want a romantic, messy fishtail braid, gently tug on each side of the braid to relax it and make it slightly messy-looking. You can also try pulling out a few pieces in the front. “The bigger the fishtail the better,” says Vaccaro, “Remember to seal your style so that it stays in place, I like to use this hairspray.”
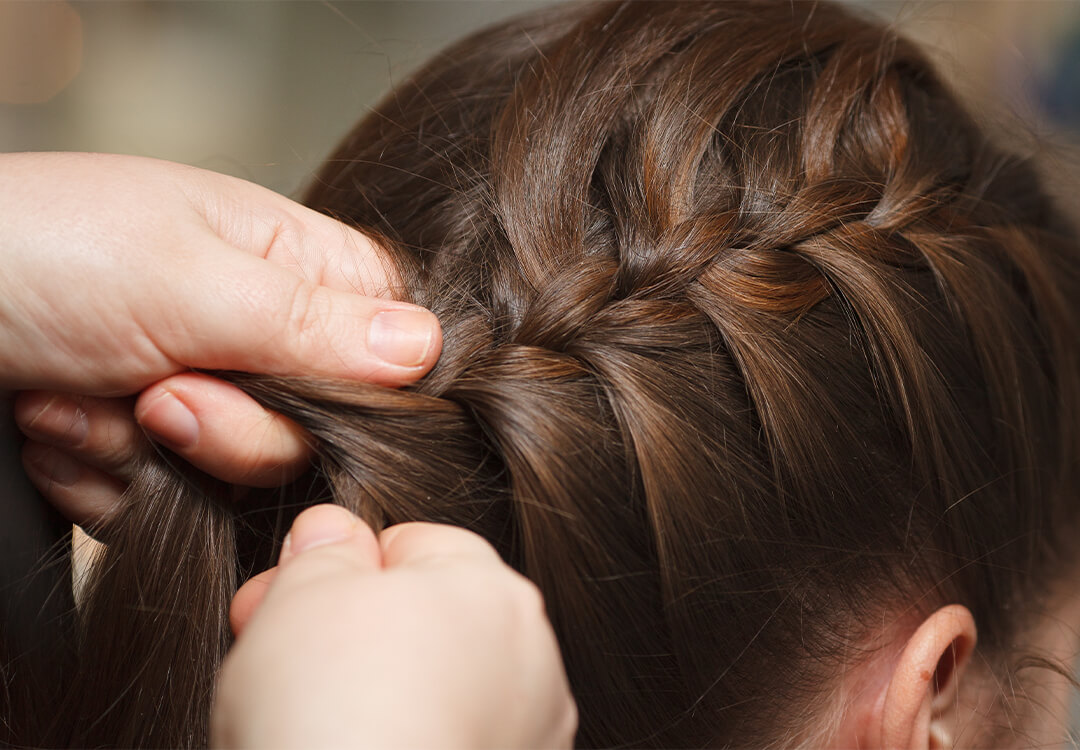
3. The French braid
Once you’re confident in your classic braid, here is a fun way to take things up a notch. Here is the low-down on how to french braid.
Step 1
Split the hair into three sections at the crown of the head.
Step 2
Begin by first creating one to two rows of a traditional braid, crossing the right strand over the center and then, crossing the left strand over the center.
Step 3
Once you’ve done this a couple of times, continue with the outside-strand-over-center pattern, but you will begin to bring in other pieces of hair. Now, before crossing the left or right section over the center, you’ll grab a small section of hair from that side of your head and add it to the outside strand that is being moved to the center. You’ll want to make sure you pick up a straight line of hair going all the way from the hairline to the back of the head where the braid is forming.
Step 4
Continue working your way all the way down until there is no hair left to incorporate. If you have long hair, you can then transition back to a traditional braid once you pass the nape of the neck.
Step 5
Once you finish braiding, tie the last one to two inches of hair into a ponytail holder.
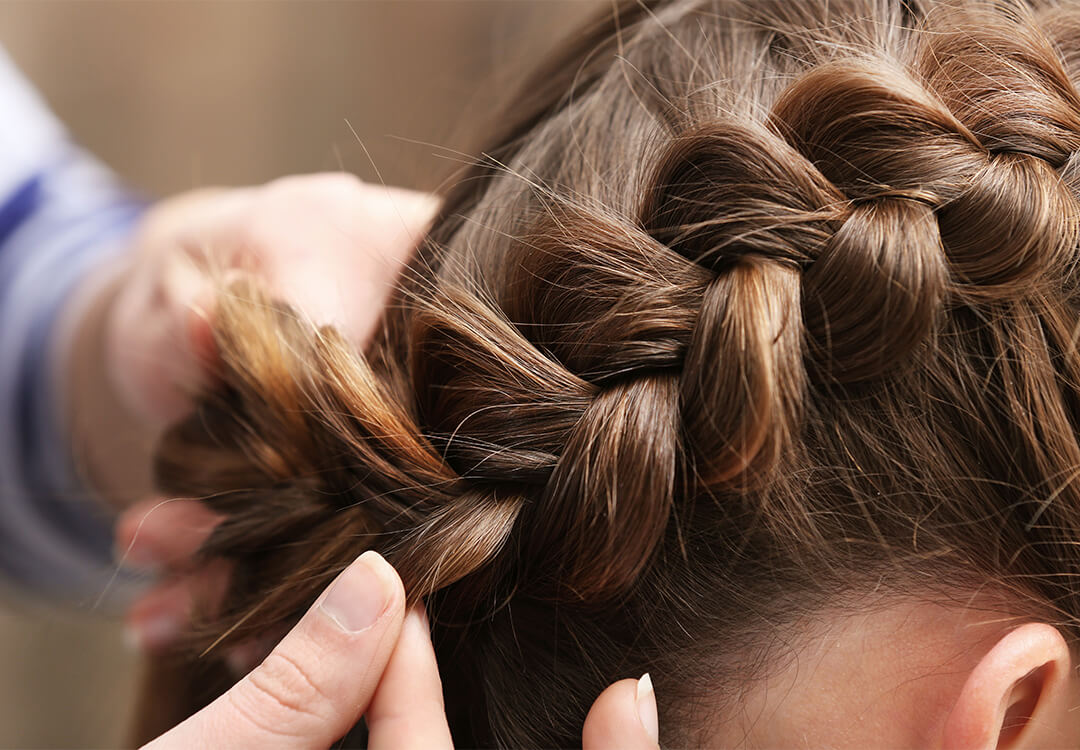
4. The Dutch braid.
Here’s the good news: If you can master the French braid, you can also master the Dutch braid. All it takes is one easy switch. “A Dutch braid is an inside-out French braid. French braids hug the head and lay closer to the scalp, whereas a dutch braid stands up and off the scalp. There is a small difference in the braiding technique used. Rather than going over the middle section each time you cross like you do in a French braid you go under the middle section to create a Dutch braid,” Vaccaro says.
Step 1
Split the hair into three sections at the crown of the head.
Step 2
Create one to two rows of a traditional braid, with one extremely important adjustment: Instead of crossing the left and right strands over to the center, cross them under the center.
Step 3
Repeat the remaining steps just like you would a French braid. Grab a small section of hair from each side of your head and add it to the strand that is being moved. Just remember to always go underneath the middle strand to create the Dutch braid effect.
Step 4
Secure the last inch or two of hair with a hair elastic.
Read also: How To Use Vitamin E On Face
Final Thought
If your hair isn’t quite long enough to fit into one single braid or even two side braids, Vaccaro recommends creating accent braids. “You can braid your hair across your hairline using the French or Dutch technique. I also love twists rather than braids for these lengths. This means you take your section of hair and split it into two instead of three and twist!”


